Sunday 30 October 2016

The Battle for Axamar

Well, this was a three stage engagement, with both ground troops, fighters and the fleet involved. 

The three missions were as follows. The fighters would screen transports ships as they left the base, the Fleet would wait to hyperspace ambush the imperial fleet as it arrived, and the special forces team would defend the base personnel and take the last transport out. 


The stakes were high as any failed mission would impact on the rebels command structure during the next phase.  


Battle one: Fire in the sky of Axamar

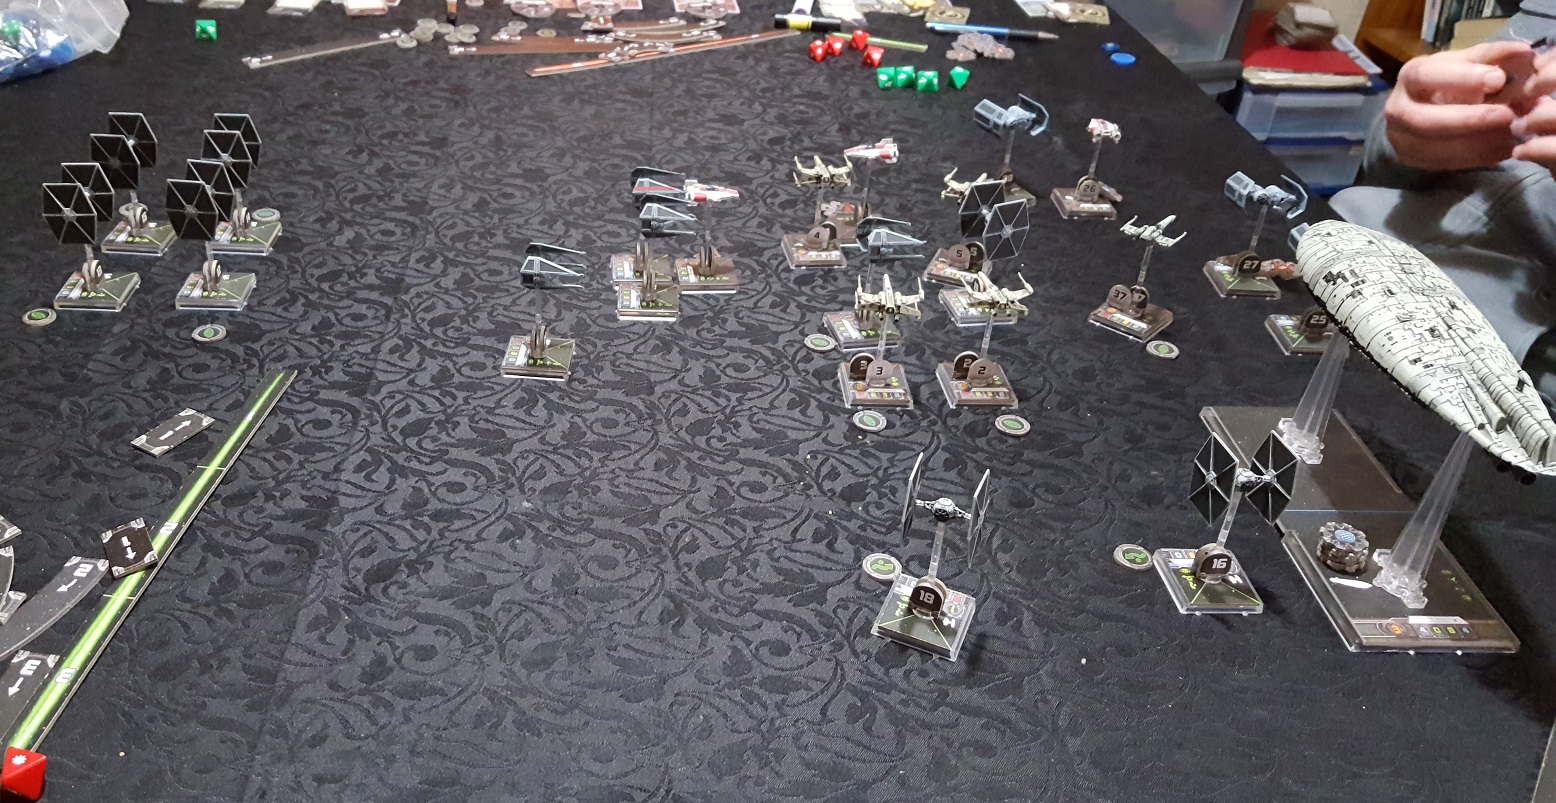
The rebels were going to be outnumbered in this one, but they had two simple goals. Get the transport off the table and kill the bombers so they couldn't get the next transport off the line. 

I was forced to deploy randomly, so split my deployment into 6 zones and rolled for where each squadron went. 


8 ties with no upgrades, 4 basic intecerptors, and 4 bombers with torpedoes and missiles for transport blasting. 


The rebels countered with 4 Awings with concussion missiles, 4 X-wings with Torps, and Airen Cracken in his Z-95. 


Things started pretty normally, with the rebels attempting to use their concentrated mass of fighters against the bombers and one group of ties before the interceptors and 2nd squad of ties could get in position. (Dr Vox just loves the camera, and yes, hes wearing an armoured hoody)


Unfortunately for the rebels, the Empire slammed on the breaks in their Tie Bombers and the A-wings, who were expecting them to fly full speed ahead towards the transport, were totally out of position. 


This allowed the bombers to punch right through the formation, and while there was some scrappy dogfighting in the grand melee, things did no go well for the rebellion. 


Once through the breach, the lead bombers hit the rebel transport with everything they had. And while the interceptors kept the rebel fighters busy, the second tie squadron crashed in on the other flank. 

Caught in a crossfire, the rebels started taking heavy damage, and once through the line, the bombers fled the engagement zone to attack the next transport leaving the surface 


Round one in the Battle for Axamar was a solid Imperial victory, with the rebels losing half their fighters before retreating, and the Empire taking out the Rebel transport and getting two bombers off the board edge. 


Battle Two: Begin planetary bombardment


While the fighters were engaged, the capital ships had a different mission. The Imperials objective was to bombard the rebel base, while the Rebels had to prevent them from doing so, and force them to retreat and get reinforcements before continuing the attack. 


The Imperial Squadron, led by the Imperial Star-Destroyer "Malice" and it's victory class bombardment specialists. Heading straight for Axamar. 


However, using "hyperspace ambush" the rebel attack fleet, supplemented by a massive expenditure of favours with Rebel high command to include a Mon Cal cruiser for the fight, were in prime position to exploit the Imperial fleet deployment. 


This is because our leaders get to make a tactics roll, and based on that roll, they can buy upgrades, including flank deployment. In this battle, they had rolled well enough to get 2nd deployment and a flank deployment. Which was huge. 


The Empire decided to break for the planet Axamar and pound it instead of breaking and engaging. They knew they would not be easily able to turn the fleet to engage before the rebels were on them, so it was full speed ahead for the Victory destroyers, while Malice would turn and engage the rebels to buy time.  


In, what can only be described as some amazing admiral skills, the Rebels were almost always out of firing arcs when the Empire came to shoot, but right within range when the rebels could return fire. 

Malice was absolutely mauled by the Mon Call cruiser, yet could never return fire on it until it was much too late. 


However, the Victory cruisers made it to the planet while the rebels were flanking and gave it a solid bombardment. Damage cards were piling up on the rebel base, and they would greatly impact the next scenario. 


This did nothing to save Malice, who could simply not bring her guns to bare on the Mon Cal cruiser, and was ripped to pieces by it, causing the Empire to signal a retreat to wait for reinforcements. 

So while this was a major victory for the Rebellion, the personnel on the ground paid a heavy price, and the base took 10 damage card worth of bombardment. 

As we will see in the next battle, this changed the scenario completely. 


Battle Three: Get to the transports


Imperial troops had landed and the main base evacuated, but the secondary command center, designed to cover the retreat, had been badly hit. 

In the Hangar at the rear of the base, three transports were ready to take survivors away. But no one was moving in the base. 


The special forces team job was as follows. 

  • Deploy at the doorway outside the base
  • Retrieve as much data and sensitive material as possible from the base (as depicted by the cards on the map)
  • Rescue as many of the survivors as possible. 
  • Get to the transports, which had limited capacity 


The base was a wreck, and there were internal fires, smoke, impassable areas, and rubble that would need to be cleared. As the team moved through the base, they would uncover survivors and material. 

But they would be on a very short timer. 


Following them into the base, was every Stormtrooper I could muster and an AT-ST for a laugh (even though it couldn't get inside the base)


As you can see here, smoke and fire was really starting to spread, and the time pressure in this scenario was the real driver. The team had to split up, make calls that included leaving one trapped rebel officer to die in a fire, and rush for the transports. 


Eventually, the team cleared a path to the transports and fought a rearguard action to slow the Imperials down so their allies could reach the transports. 


But overwhelming numbers mean't they could only delay, and once the bases crew were onboard the transports, the assault team bolted and ran for the transports. 

Almost all the secure data and base personnel recovered, and two of the heroes were wounded. But it felt very close and tense the whole way through. 


Final outcome


Imperial fighters carved a hole in the rebel transportation corps and the fleet had a good day against the empire, while still allowing the Empire to bomb the rebel base. 

But in the end, the ground forces managed to pull off a close win and save the rebellion from catastrophe. Still, there will be some rolls in the resolution phase to see just how bad the damage was, and if anyone didn't make it out. 


Monday 17 October 2016

Talathen Sector - Round 6 - The Empire Strikes back

Round six is in the books and we are beginning round 7. The Talathen Sector campaign will end in round 9, which corresponds to when Return of the Jedi happens. 

Round six is set just before the Battle of Hoth, and imperial probe droids have, while searching the galaxy for the main rebel base, located the Talathen sector base on Axamar. 

As a result, the major focus of this round was evacuating the base before the Empire wiped it out, fortunately, due to good intelligence, the Rebels knew the attack as coming and could prepare. 

Recruitment, and some healthy politics

A regular gang of new recruits were available, but the first recruit up for bid was the Red Queen, ruler presumptive of the newly freed Nimbala. The Basra Consortium, looking to shore up its investments bid 22 Clout for her loyalties, for the short-term at least. 

Also up for bid were a collection of pilots, soldiers and specialists, including the very first force-using character for Imperial Assault missions

Probably the most surprising move of this round was the Luxon militia saving all their clout for one purchase, that of Mozza Thun for 32 Clout. 

Gemma, Dao-Vurn and Hobbie went to work for the Basra Constortium.

Diala joined the Peoples movement, along with Occa. 

Jinn and Beryn joined the Republicans. 

The Basra consortium continued its move away from support people to military specialists. 

In the political round, several changes were made. X-3P0 was forced to step down after a terrible Alliance phase the previous turn, and was replaced by Mozza. From Slave to Alliance leader in one move. 

The racist Nun Diem was also finally sacked from being head of R&D and replaced with the competent, yet slightly boring looking Beryn Krell. The Republicans finally had a non-combat command for the first time in the campaign. 

Which of course means they had to be stripped of a combat command. And Airen Cracken, despite an exemplary record as fleet commander was forced to step aside and let the Beast of Luxon, Oleg Thrax assume command. 


This Major shake-up means the combat roles are now 

Fleet - Basra Consortium
Squadron- Republicans
Ground - People's movement
With the Luxon Militia frozen out of military command and focusing on diplomacy and alliances. 

The strategy phase

Now its worth noting that this phase took place before our epic adventure in Cahn, so notes of a viral outbreak on several worlds in the core system were troubling, but not as troubling as the imminent arrival of an Imperial Armada

Alliance command, under Mozza, secured enough points on their role to activate all alliances this round. The Red Queen, The Wookies, The Hodda Clan and the Bothan spynet would all be contributing this round. A huge swing from last turns inactivity. 

Many considered this a sign that the shakeup had done its job. 

Logistics command stockpiled resources as normal, but hit on several intelligence boosts while trading. Combined with the Bothan Spynet, Rebel intelligence command would have an unprecedented amount to spend this turn. 

Manny Bo'thans, super spy, slipped into the Korvas shipyards to find out what the massed Imperial fleet was doing, it was then he discovered they were heading straight for Axamar and the Rebel base. This changed the earlier discussed plans and everything focused on evacuating the base

Ged'Ruh focused on dropping false leads about the rebellion, shifting eyes away from Nimbala. X-3PO, deposed from Alliance Command, went into deep cover on Talathen VII station. And Sly conducted support missions for the Luxon Militia forces on Luxon, it was probably the only help they would get this turn. 

The Diplomacy core set about opening a dialogue with Kronos & potential rebels on Korvas. 

Lianna tell spearheaded an operation to convince the administration of Selano that the Alliance had more to offer than the Empire, who couldn't even build a base without it blowing up (we miss you Gax).

A stunning pair of triumphs vastly increased Selano's support of the rebellion, and work orders for the Empire were suddenly delayed. 

The Red Queen also consolidated the Rebellions hold on Nimbala

Fleet command had one goal, and one mission. Protect the base until they could escape by ambushing the Imperial fleet as it came out of Hyperspace

Squadron command also had one goal, protect the transports leaving the rebel base. But Lt Telji's squad was also dispatched to investigate rumours that pirates had uncovered the wreckage of a Subjugator class cruiser in the boneyard. 

Ground Command had Besh squad defend the base and hold the line until the last transports escaped, while Del Kern and Cresh squad caused a distraction on Nadir. The Wookies, were once again, fighting alongside the Luxon militia on Luxon

Recruitment had a bumper round, gaining an unprecedented bonus to recruitment, while training and R&D enjoyed modest returns, with Hodda and his cartel focused in on the new virus that had appeared. 

Intelligence spent its remaining points digging deeper into the core worlds of Talathen, Talathen VII and Korvas


Conclusion

The battle lines are set, next up was the evacuation of Axamar base. A three stage battle using Imperial Assault, Armada and X-wing. Update to follow


Friday 14 October 2016

Radlandz - Group Identities


Version 0.7 of the Radlandz rulebook is available now for anyone who wants to see the changes. The game is tightening up and playtesting, when we have done it, has been solid fun. 

Today I wanted to talk about how a roster of figures, a group if you would, will look in Radlandz

One of the defining features I wanted for Radlandz was to give players a load of options of how to customize their groups. 

The two traditional approaches to list building in skirmish games are


Lists

Your gang has a set roster and you can pick stuff within your gang. The advantages of this are that each gang has a defined flavour and play style. The downside to this that you get a form of homogeneity, as few options means few differences between individual groups within the same list

Open recruitment 

You might have a smaller "core list" of defining feature for your group, but there is a massive pool of other units you can pick up. Opening up lists too much also tends towards homogeneity once people figure out the two or three "good" characters you can get. 

A third option

Radlandz uses identities, 12 of them in fact, and one identity is always your "core identity", but it can change through the campaign. This core identity defines a lot of your skill list, equipment and characters, but it can be supplemented by additional identities to provide flavour and variety. 

It means you can get every available skill and model with one group, but certainly not at the same time, and shifting your groups identity scores and building the facilities to recruit new troops and train new skills costs resources. 

How do identity's guide model selection?

Well, they are themes, archetypes, styles and concepts rather than prescriptive groups. For example, if you want a group to be a small group of elite power armour wearing baddasses, you pick Mech as your primary identity. 

This means Mech is a perfectly fine identity if you are playing Space Marines, Sisters of Battle, Brotherhood of Steel, Sky-net Terminators, Killer Robots, or any other concept that fits within the archetype "Big armour smashy"

How does having multiple identities work?

Only one identity is your core, but you can delve into others. For example, if your gang belongs to a mutant township that is settling down and trying to live civilized. You may want to split points between Mutant and Civilized. 

You might want a core group of light-fast moving nomads as your core group, backed up by a few Brutal specialists with over-sized guns and swords. 

You will likely only be able to delve into a few identities during a campaign, but they will add flavor to your lists and open up extra options. You can also play with a single strong identity, and spend upgrades improving their core abilities instead. 

Can I pick any identity?

Identity scores go from 1-6, for an identity to count as a core Identity it must be at level 4 or higher (and you must start with one identity at this level)

Each identity has it's opposite pair, and you cannot have more than 6 points in an opposite pair.

For example, A Group with 5 Arcane can never have more than 1 techno, and if they want to increase Techno to 2, must drop their Arcane identity score to 4. 


The identities are listed below, in their opposing pairs (nomad vs Civilized for example)


What are the identities in Radlandz?


Nomad

Nomad groups have a mobile base of operations and spend their lives moving from place to place scavenging for supplies and parts.

Pick nomad if you see your group as a roving band of scavengers who can hit and run, survive the wastes, and generally be far more annoying than deadly.

Features: Nomad forces are fast moving, lightly equipped and armoured, and can loot very well. They are also well equipped to deal with environmental hazards.


Civilized

Civilized groups have settled down and built a place to defend and protect. They are farmers, builders and engineers

Pick civilized if you see your group as regular people who have to pick up weapons to defend what they have worked hard to protect. 

Features: Civilized forces can field larger forces than most, and provide more special equipment and support items. A bigger roster and better gear overcomes any lack in specialist combat training.  


Arcane

Arcane groups have tapped into some arcane force that exists in the Radlandz. This can be a magical, religious, mystical, psychic or other worldly power.

Pick Arcane if you see your group as a mystic organization or cult roaming the Radlandz led by a powerful wizard or priest.

Features: Arcane forces have access to game-breaking spells and effects. They are also able to use relics and arcane items easier than most. Arcane bosses and specialists are capable of amazing feats, but the rank and file Gruntz tend to be poorly trained and equipped.  


Techno
Techno groups are obsessed with technology and gadgets. They have shiny guns and other interesting devices at their disposal. 

Pick techno if you see your group being obsessed with reclaiming lost technology or hoarders of old world secrets.

Features: Techno forces have the best access to specialized gadgets that allow them to pull of unusual moves on the battlefield. Techno troops have some of the worst stats, but make up for this with excellent equipment. 


Primal
Primal groups have embraced a more primitive lifestyle and a return to nature. Primal groups believe in spirits, omens and the power of the Radlandz.

Pick primal if you see your group as one that has fully embraced the new world of the Radlandz and seek to live with the wastes as opposed to trying to rebuild society.

Features: Primal forces are lightly armed, quiet and fast moving. They have access to many low tech weapons, poisons and traps. They also have limited access to game-breaking mystic powers.          


Mech

Mech groups rely heavily on suits of heavy armour and other machines of war and industry. While others run to battle, Mech forces lumber forward, shrugging off small arms fire.  

Pick Mech if you see your group as a group of armoured knights or elite warriors in the Radlandz.    

Features: Mech forces are small but very well armoured and capable of taking more damage than others           


Warrior

Warrior groups are obsessed with personal glory and one on one melee prowess. They are the ultimate hand to hand fighters in the Radlandz.

Pick warrior if you see your group as a warband of raiders and fighters who want nothing more than to stab people and take their stuff. Or, alternatively, a warrior cult obsessed with honour and personal prowess in battle.

Features: Warrior groups excel in melee combat, but this focus leaves them weak in other areas. They field far fewer guns and ranged support units than other groups.  


Martial
Martial groups are focused heavily on order, discipline and coordinated tactics and command. They use timing and firepower to suppress an enemy to make them easier to defeat.

Pick martial if your group is a disciplined and structured war fighting unit. They can be a formal military group, or one that has adopted a formal command structure in order to survive the Radlandz.  

Features: Martial groups are expert shooters and have other abilities that improve their ability to make coordinated attacks and suppress opponents. Their reliance on ranged weapons leaves them  under-equipped in melee.           

Mutant

Mutant groups are no longer normal in some way. They might be mutated humans, mutated animals, or any other non-human race that has developed in the Radlandz. 

Mutants are tough and can develop unique mutations that give them special bonuses.   
Pick mutant if you want your group to be tough and resilient to the environment of the Radlandz as well as a little unusual.

Features: Mutant groups are defined by their mutations, special bonuses that allow them to specialize in specific skill areas. In general they are poorly equipped, but make up for it with their mutant skills and general toughness.      


Shelter

Shelter groups have escaped the worst of the effects of the Radlandz. They have a secure base that is sealed off from the outside world, whether this is an underground shelter, a space ship, or mobile fortress, what matters is that they are well equipped and secure from the Radlandz.

Pick Shelter if you want your group to be a surviving relic of the past, or an outside force that has recently arrived in the Radlandz.

Features: Shelter groups are well-equipped and supplied. While they don’t excel at any specific combat discipline, they have few weaknesses. They also have access to environmental controlling technology and other gadgets. 


Covert

Covert groups are experts in stealth, infiltration, assassination and other dirty tricks. They rely heavily on surprise attacks and precision. Covert groups are reasonably poor in a stand up fight, but if they are fighting that way, it’s because they aren’t being covert enough.

Pick covert if you want your group to be sneaky and subtle. They could be an order of assassins, a secret society, or Special Forces. As long as the group favours subtlety over brute force, they could be covert.  

Features: Covert groups are lightly armed, lightly armoured, but gain major bonuses to using cover and avoiding being hit. They can deal a lot of damage, but tend not to be able to take much damage in return.                 


Brutal

Brutal groups care little for being quiet or subtle. They bring loud heavy weapons to the fight and pound their opponents into submission. If the big guns fail, then big melee weapons are also an option.

Pick brutal if you want to field a force of highly armed and dangerous fighters who will win the day through application of extreme firepower. They could be    

Features: Brutal groups carry bigger and nastier weapons than anyone else, and have the training to back that up. The rest of the skill selection is lacking though. Every problem needs to be solved with “more firepower”  


So that's the identity's of Radlandz. An archetype for everyone, and if something doesn't quite fit what you have in mind, you can mix and match identities until it does. 
Related Posts Plugin for WordPress, Blogger...